2018年6月25日星期一

Part 2: Different Ways to Wear a Ponytail

A ponytail with ripples
For this, make a normal ponytail at the height you prefer. Then, with the help of transparent elastics, create volume all through your ponytail. In this way, you will give the effect of small ripples on your ponytail and you will create more volume.

paperboy hat

Romantic ponytail
Unravel your hair very well, then make a high ponytail. Then, tie it with a rubber band and cover it with a small strand of hair all around. You can change this hairstyle by adding a braid if you want to change its look and make it more special.

Ponytail with ray in the middle
Make a well-defined line in the middle of your head to separate the hair on both sides. Then, make a ponytail at the height you want. Before attaching the ponytail, pass a comb on both sides with a little gel. This way you will give a more defined look to the hairstyle. The idea is that all the hair is well combed and no wick escapes from this hairstyle.

Very high ponytail
Lower your head so that all your hair falls down. Then take them with both hands from behind and brush them well to leave no knots. Finally, tie them with an elastic strong enough that the ponytail remains high all the time.

Ponytail with locks
This style will save you when you will have a lot of time and whatever your hair type. It does not matter if you have not cleaned or unraveled it. To do this, simply gather your hair on the top of your head and brush them up and down. This hairstyle will give you more volume. Finally, you can make a normal ponytail or on one side and to make you look more stylish, you can use a paperboy hat or a beret.    

Other tips
In winter, you can give a more sophisticated touch to your hairstyles by smoothing your hair before. In this way, it will give you a very neat appearance. If you want a younger look, you can make a high ponytail, so that it is right on top of your head. If you want to give a romantic and classic touch, instead make a low ponytail, but not too much.

The attached hair brings us a well-prepared and sophisticated look that can be used for any occasion, as long as it is matched with the appropriate outfit.

Remember that to achieve a perfect overall look, you need to combine your hairstyle with your makeup and clothes. In this way, you will always be impeccable in any circumstance and throughout the year.

Part 1: Different Ways to Wear a Ponytail

Today in this article we will give you several ideas for wearing a ponytail. You will have no doubt when you want to make yourself beautiful. Do not lose any details of these fantastic hairstyles.

The ponytail is one of the easiest hairstyles to be made and that can always be flawless in all circumstances. Over time, this hairstyle evolved and became very versatile. For this reason, there are hundreds of options available. Everything will depend on your tastes and events.

paperboy hat

You can, for example, make a ponytail by making braids. But they can also be high, low or centered. Anyway, you can adapt them according to your tastes and your mood.

In general, we are all looking for the easiest and easiest way to style ourselves . Especially when we do not have the time or we do not know what to do with our hair. Sometimes we just want to improve our hairstyle and try something new.

Today we will show you a few different options and styles that will help you make a ponytail in the best possible way. It does not matter if you have long or medium hair. You will only need a comb or a brush and some elastics.

A triple ponytail
Separate your hair into three sections and tie them with elastics one over the other. Flip the end of the ponytail and slip it between your head and the elastics. Then, pull on the bottom part. Tuck both upper ends of the hair underneath.

Separate your hair into three sections and tie them with elastics one over the other. Flip the end of the ponytail and slip it between your head and the elastics. Then, pull on the bottom part. Tuck both upper ends of the hair underneath.

A ponytail with volume
Make a long ponytail and tie it with an elastic band. Then divide it in half and separate it with a bar of the same color as your hair. Then hide it with the upper half of the hair. Professional stylists claim that the higher the ponytail, the more the overall look will be ideal.

A side ponytail
This type of ponytail is very convenient for everyday use and during various activities. And you can also wear a paperboy hat to make you look more stylish when wearing this hairstyle. And this hairstyle will be perfect for a business meeting, an appointment, for exercises and even for a walk. It is also suitable for all types of hair, whether long, short, smooth or curly.

2018年6月22日星期五

5 Nail Art Ideas to Decorate Resin Fake Nails

Do you dream of the follies of your nails? This is the time to embark on false resin nails and enjoy the fantasies they allow without risk of damaging them. For this, here are some tips that will allow you to customize your fake nails, whether everyday or for special evenings.

FALSE NAILS IN RESIN: A LARGE PANEL OF FANTASIES
False nails have earned their place in glamorous and chic accessories. For those who have an unfortunate tendency to bite their nails, this is a perfect alternative. In addition to being able to choose the length of the nails in resin, they are more solid, and above all, it is possible with them to realize some fantasies to have a look in total adequacy with your desires! Let yourself be tempted by five small creative ideas on your resin nails.

nail stickers

FRENCH MANICURE: ELEGANCE IN FRENCH
The French manicure is a makeup of nails more and more popular. For those who do not have a manual job, this is the ideal. This type of French manicure precisely recalls the refined and elegant side of French fashion. For that, it is enough to deposit a specific varnish, the "base coat", to protect the nail in resin and to optimize the adhesion of the other layers. Then apply a strip of white nail polish on the edge of the nail that will act as the delimitation. Then simply switch to the layer of "natural" varnish that can be colored or not. Finally, add a layer of clear varnish: the "top coat". According to the desires, it is quite possible to add rhinestones or to realize original motives.

OMBRÉ MANICURE: A TOUCH OF ORIGINALITY
A simple little fantasy to realize that will sublimate your resin nails. The technique involves shading your nails with a color to create a nice gradient. So think about choosing two colors that fit well. To apply the first coat of nail polish and then use a brush (sponge) for eyeshadow for the second layer and then dab the top edges of your nails inward. Your fake nails are ready to go out!

NAIL VARNISH IN RELIEF: OUT OF THE CLASSIC
This small technique will allow you to change the banal pose of lacquered varnish or matte. Apply a first coat of the polish of your choice and apply special powder or eyeshadow. Then remove the surplus and let act. The varnish will absorb the powder and the result will reveal nails in relief!

DEGRADE PAILLETÉ: FROM FANTASY TO THE END OF NAILS
Original and simple at the same time, the glittery gradient is essential for your evenings a little chic! As with many nail art methods, you will need to first put a pretty bright transparent base. Then apply on the tip of the nail resin a colored varnish and especially glitter. You will get a beautiful gradient to exhibit without moderation!

STRASS AND NAIL STICKERS: EASY AND FUN
In the shops or on the Internet, nail products bloom and there is plenty of choices to decorate your fake resin nails. Rhinestones, for example, are quite trendy and add a touch of glamour to your hands. The same applies to nail stickers of all kinds, which bring a note of creativity to nail varnish a bit commonplace. Low prices, nail stickers are a solution for those who have neither the time nor the patience to linger on their nails!

Original and natural, these nails stickers are real dried flowers to apply on her nails!

2018年6月20日星期三

A Complete Guide on Growing and Shaving a Beard

The basics of shaving: learning to love your beard and live with it.
Masculine, primitive and authentic ... The hipster beards today predominate shaving tendencies. Remembering New England lumberjacks and Victorian gentlemen, the trendy men from Brooklyn to Berlin rejected the trend of juvenile faces for full beards, mustaches, and pruned goats. These shapes and styles from the Old World confer a certain vintage masculinity charismatic, distinguished and sophisticated.

FLYCO Rechargeable Razor

So it does not matter if you are trying to grow a beard or if you just want to perfect the one you already have; do not hesitate to read the following tips and to get inspired: Patience is the secret of a perfect beard.

You have decided to let your beard grow. You will discover that beyond just throwing away your razor, it also requires maintenance and time. Here are some tips to help you "survive" this process.

Tip # 1: Choose a beard pattern.
If you doubt that you can ever get a full beard, it may be useful to portray a "bearded model". By reminding yourself of the reason you grew your beard, your model will give you the strength to continue, even in the most difficult times.

Tip # 2: Stay away from this razor.
For most men, getting a beard they can be proud takes between four and six weeks. It is a long process that requires time and perseverance. It is important not to forget it and especially not to touch your razor, whatever happens. Shaving a beard does not make it thicker, it only slows its growth, reducing all your efforts to nothing.

Tip # 3: Say goodbye to itching.
Itching and irritation are never pleasant, but they are the price to pay for a beard. To prevent skin irritation, we recommend that you wash your face daily with soap and water or facial cleanser, and use a moisturizing or soothing cream to reduce dehydration and redness.

Tip # 4: Choose your favorite style.
While you bear the embarrassment caused by the growth of the beard, do not hesitate to distract you by thinking of the final style that will suit you best. For more inspiration, please visit our page "Face Shapes and Beard Styles".

Tip # 5: Start mowing.
When the growth is sufficient and you have chosen your style, you can finally start styling your beard. To do this, you will need an FLYCO Rechargeable Razor to set the neckline before working the rest of your beard, but it is usually best to keep a natural cheek line to avoid any questionable results. Discover our range of mowers to find the one that best suits your beard style.

Warning! The secret of a successful beard is mowing
During this exciting phase of beard growth, it is easy to forget to take care of it. In order to keep a quality beard, you will need to regularly mow it. Because what you want is a stylish beard, not a shaggy tuft.

Tip # 1: Mow your beard to keep it at your preferred length.
For a neat mowing, do not hesitate to perform FLYCO Rechargeable Razor movements in all directions to capture a maximum of hair. When you paint, it's the opposite: always make sure you follow a downward motion to maintain a clean and neat look.

Tip # 2: Do not be afraid to shave close up.
To maintain many beard styles, it is important that specific areas of the face be perfectly shaved. This makes it possible to accentuate the contrast between the shaved areas and those that are not, and to delimit sharp contours. The Braun Precision Mower is specially designed for close shaving and precise contouring in specific areas, such as legs.

Tip # 3: Maintain it.
In addition to keeping your beard and face clean by washing them regularly and thoroughly, it is also important to take care of your shaving utensils. By maintaining them well, you make sure to keep them in perfect condition, allowing you to maintain the beard you are so proud of.

2018年6月14日星期四

How to Whiten Yellow Nails ?

We already saw different remedies to harden the nails , in this case we are going to see remedies of how to whiten them . Because of daily tasks and pollution, they can lose their natural tone and become more yellow than normal.

It is also likely that the repeated use of enamel will give them a yellowish color . Other factors such as smoking or some hormonal disorders can make them look yellow and not white as you wish.

nail art kit

Whatever the case, I'll tell you how to whiten the yellow nails of the hands and feet.

It is important to help the nails recover their natural whiteness and not to hide their opacity with more enamel, because the consequences would be even worse.

In this post we will see how to whiten the nails with some methods that I use, especially when I let them rest from the manicure. Do not forget to do it with your toenails, it is even more important to do it there, because they are always covered and have a tendency to adopt a yellowish tone.

Whitening yellowish nails
Then we will see the perfect methods to return them to their natural tone, when you see the results you will adopt these routines.

The whitening of yellow nails is not a big problem if we know the remedies.

Whitening toothpaste
How to whiten yellow nails is not done frequently, try this method first. It's easy and it works! Use your nail art kit to apply it and give a good scrubbing for a minute or two.

If you need a soft nail polish it will be a good solution.

Cleaning with lemon
As we all know, lemon is a natural and very powerful detoxifier. To make the cleaning with the lemon, we can cut the lemon quarters and pass them directly through them or extract their juice in a bowl and submerge them.

This is a cleaning that should be done regularly, think that even when you cook with lemon it can be a good opportunity to take advantage of the small pieces and pass them through your hands.

It can be a maintenance to avoid yellowish nails.

Bleaching with sodium bicarbonate and 3% hydrogen peroxide
This is a method of yellowing the effective yellow nails and especially recommended if they yellow significantly. I guess it's not the first time you hear about bicarbonate, a star ingredient in the lives of our grandmothers.

Bicarbonate has multiple uses both in the beauty area and in the kitchen and home area. You will know that baking soda is excellent for cleaning teeth and that it is included in the recipe of hundreds of toothpastes.

In the same way, the union of bicarbonate with hydrogen peroxide helps us to remove the yellowish layer quickly .

To do this we only apply the mixture and leave it for 20 minutes. We need the help of a brush in your nail art kit (it can be a toothbrush), with which we rub the surface below.

We mix it with these quantities:
2 ¼ teaspoons baking soda
1 teaspoon of 3% hydrogen peroxide
Then we clarify and you will see them!

2018年6月12日星期二

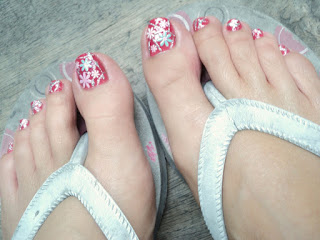
What Nail Polish for My Feet This Summer?

Varnish is the star makeup of summer. We adopt its neon colors, pastels or nude on the hands ... but also on the feet. But beware of the overdose of colors! Our tips for picking the trendy colors you need, without any taste!

 cuticle cutter

This summer, a wind of madness is blowing on our toes! If the orange is still on the rise, the yellow, fuchsia and green water are stealing the show on the podiums. In flashy or pastel version, adopt them according to your desires, but also according to your skin tone or, for the most perfectionists, taking into account the color of your bare feet.

1.What color with my skin tone?
- The light ones will prefer declensions of deep pink like fuchsia. Dare the flashy, it is not the prerogative of caramel skins. It is a very good ally to boost the porcelain complexion. The more discreet will adopt pastel colors, very fashionable, or nudes such as pinkish beige or shortbread.
- Matte or already golden skin, you neon yellow or Roland Garros, very trendy, water green or pastel turquoise. The classics, like vermilion red or blood orange, are always your best assets to enhance your tan. But avoid the tone-on-tone nude make-up.
- Finally, very fashionable, the deep blue matte or electric, which suits both fair skin and gold.

2.The possibilities of mix and match
- Do not hesitate to associate mismatched colors on the hands and feet, but without ever playing the card of total flashy or pastel look. And if between hands and feet, you must choose, opt for them. Less applied, the varnish remains impeccable longer, and the colors are more fun!

- With your sandals, bet on complementary colors, such as electric blue with orange, or yellow and green water. With nude barefoot like bronze, prefer the flashy pink or simply a  french manicure.

3.The beauty of your toenails
- Give them an almond shape with a thick grain file (100-180 instead of 240 for those of the hands).
- Use a cuticle cutter rather than scissors, so as not to lift or deform the nail.
Tip: for good adhesion of the varnish, remove the sand from your feet before attacking the pose.
- Make your color long lasting by applying, once your cuticles have been pushed back, a treating base or peel off.
- Apply your varnish without touching the cuticles or the edges of the nail. Let dry for 5 minutes between the superposition of the two thin layers.
Tip: to prevent your varnish from flaking, brush the material over the end of the nail.
- Prefer the use of a top coat in gel version. Thicker, it will be a better guarantee of a long-lasting manicure.
- Little hitch on the beach? Do not try to tinker, the color difference will be visible, just like the brush marks.